Sunday, December 13, 2015

This is what a hand-tool problem looks like.

This is how far I got ripping by hand (pictured) before I remembered that I have an electric jigsaw. Maybe 2 or 3 feet.

Step 1 is admitting you have a problem, and I think step 2 is bargaining. After that I'm a bit hazy.

...Then I thought, "meh, I don't feel like taking it off the wall", and proceeded to rip the rest of the 7 feet by hand.

In all fairness, using the jigsaw would have meant taking it down, plugging it in, puttting on safety glasses, hearing protection, and dust mask, making the cut while keeping the cord out of the way, putting the tool away, putting eye/ear protection away, wearing the dust mask a little longer while the dust settled, getting sick of it and taking it off after 10 minutes, and having an itchy throat for 3 days. Heck, I needed the exercise anyway.

But these are just rationalizations and excuses. Obviously, power tools are always more efficient. If you see a scene like this or hear so-called reasons like these from a friend or loved one, help is not far away.

Take them to your local power-tool vendor and introduce them to a salesperson. They probably just need someone to accuse them of being crazy, before it's too late.


Saturday, December 12, 2015

2 things that really don't need to be combined.

Woodworking and drones, that is. The other day when my friend Kevin was with me in the shop, we were playing with a new toy--a cheap little quadcopter that can take lo-fi videos. I was flattening the bottom of the top of my workbench, so we got some footage. Here it is, in all it's shaky, low-resolution glory.


Friday, December 11, 2015

2 out of 2 ghost agree: there's no such thing as too many clamps

Yesterday my good friend Kevin was at my place, and he was nice enough to help me glue some more thickness onto my workbench top. More hands make it easier to finish while the glue is wet, so thanks a bunch Kevin! We are both interested in photography and silliness, so this was the result:
We piled on weight, and then used typical clamps to get the front glueline as tight as possible.

Bonus tip: spreading shavings around the floor is a good way to catch glue drips. Just sweep when dry(ish).


Wednesday, December 9, 2015

Trying a wooden jack plane

This old jack is still a workhorse
Even though my metal jack plane does a good job removing thick wood shavings, I have been wondering for a while if a lighter weight wooden plane might allow me to be more efficient. Last week I found myself face to face with a vast selection of vintage wooden planes at the Liberty Tool Company in Liberty, Maine. Knowing that I had a lot of stock removal waiting for me at home (on the underside of my workbench-top in-progress), I decided to give it a try. After hefting 30 or so possible choices, I found one that was just right. It had all the parts, was pretty light, and even had similar ergonomics to my metal jack (so as to work at the same workbench height. I brought it home for an incredible $21. Although I've heard that New England (where I live) is a good place to find old tools, this was my first experience seeing a large stash of good ones.
At the end of this experiment, I'll be getting rid of one jack plane. Building the Anarchist's tool chest has taught me to value my space highly, and I now own three jack planes, two of which are set up for efficient mass stock removal. So I'm paying close attention and thinking hard about my choices here.

So far, the wooden jack is looking like a potential winner, largely because of the weight (so it's good I didn't get the solid rosewood one). Like I would with any jack, I spent a few minutes cambering the blade.

However, there were a few caveats with this approach:

  1. The back of the iron wasn't perfect, so I had to swallow my perfectionist nature and use the ruler trick on the back. I'm hoping the tiny back bevel will disappear with successive sharpenings. This doesn't matter much at all.
  2. Adjusting the wooden plane takes a few minutes to get used to. For me, this was about 15 minutes. Maybe it would take longer if I was trying to be as precise as I would be for a smoothing plane, but for coarse shavings, it doesn't seem to be a big deal. Hit the toe, iron, and wedge until it sits where you want it to--no big deal if you are comfortable with any other plane.
  3. Buying used has it's pitfalls. If I wasn't paying attention I could have bought one with no wedge. I recommend paying attention to detail even if you're not spending hundreds of dollars, because of the time you can save. I looked at all the same things I would look at if I was about to tune it up--does the wedge hold the blade firmly, does the blade have some life left in it, is the tote relatively intact, etc. In the end, I probably spent an hour browsing the store, and a half-hour getting the plane tuned up.
However, none of these really amount to much compared to the fact that I just knocked about a 16th of an inch off the bottom of a 2'x7' workbench while barely breaking a sweat.
This rippled surface might give you some idea of the shavings that are coming off.
So, I think lightweight and wooden is a good way to build a jack plane. In a smoother or jointer, I appreciate the precise depth adjustments that come from typical metal versions, but with a jack plane I just want to get on with the work without making my muscles too sore. (But for the amount of wood I had to remove on the bottom of my bench, starting with a circular saw and an axe didn't hurt either.)

In conclusion, wooden planes are fun, efficient, and not scary. Cheers!

Saturday, November 14, 2015

How to build a workbench with another workbench in the way

I'm finally starting my Roubo[-style workbench]. I ordered hardware, a gallon of glue, and started jointing and gluing up the ash that's been sitting around my basement waiting for this day. I'm hoping to get it done this calendar year.

Although I did briefly consider a half-serious walkthrough of the process of building it using another workbench, there's just been too much Roubo on the internet already. So here's a few pictures just to show you that I'm starting in on it. I'll sum up when I'm done with a brief look at any unusual features or choices.

Cheers!

Jointing a lot of boards

Planning the glue-ups.

Clamps on glue makes me feel like I'm actually building something.

Monday, November 2, 2015

hanging bikes and reclaimed mahogany

This weekend I helped a friend make some hangers for french cleats we recently put up in his garage.

French cleats holding bikes and garden implements.

By the way, one big hook at the right height makes a pretty effective way to store a bike.

Sawing plywood on ikea sawhorses, as part of an effort to suss out any big gaps in my friend's small tool collection.

I also scored some mahogany (I think) from a shoddy hutch type thing sitting in his garage from the previous owner. Thanks Kevin!

...at least I think it's mahogany. Whatever it is, it's nice medium hardness with roey grain.
I stripped some of the ugly brown stain of the reclaimed boards, just enough to preview it's beauty. It will be fun to see what I can turn it into.

Wednesday, October 28, 2015

planer stand

I recently aqcuired a new planer and built a rolling stand for it. Here's how it turned out:

Unfolded and empty

Folded and full, including storage and wedges

The planer is a DW735, which now has a Shelix head in it. I've got some more photos showing the details. of the stand and the setup, and how I got there.

I got plywood and some clear riftsawn construction lumber from the local home center.
With the planer set up on another surface, the parts were milled to size.


Here's the basic planer stand. the casters are on plywood triangles that are not easy to see. I hid many of the screws.
I eventually installed the Shelix head. Here you can see the reflection of the little carbide blades. I am  very satisfied.

The Shelix head is a little smaller, apparently. Masking tape to the rescue.

Here's a dowel notched to hold the folding tables up.
Shelf in two sections. This should make it easy to remove, sweep, etc.


Tuesday, October 27, 2015

Wednesday, October 21, 2015

I'm really enjoying flat concrete

The concrete repairs went really well. I watched a professional do it while I puttered around the shop and built a paper towel holder for french cleats. I was impressed with how it could be thin and runny enough to level itself out, but also thick enough to stop at a certain point before flowing downhill under the mats in the other part of the basement.

Here's a pretty boring picture of a nice smooth flat floor. But I'm excited about it.

 Once the floor was dry I started taking full advantage of it. I wheeled my tool chest into a perfect working position. I cleared off half my sharpening station and put a shiny new planer on it, then wheeled it and a shop vac to the new section to start making a mobile planer stand (but that's another post).

Stuff with wheels shows the floor repair's reason for being.

The other benefit I noticed is that I now feel like sweeping. I think I'm doing it about once every 2 hours I'm down there, and that's several orders of magnitude more often than before.

I am definitely not going to cover the whole floor with squishy mats again. Wheeling and sweeping are just too nice to mess up. If I need to reduce leg fatigue I'll put a localized mat in front of my workbench or double up on insoles.

Friday, October 16, 2015

Taking a break for concrete improvements

Today one of my largest impediments in the workshop is going to be removed. A rough, pitted concrete floor in part of my shop will be repaired. I want to be able to wheel heavy things around, like my tool chest, drill press, etc, but the floor has been making it very difficult. It also has been annoying to try to sweep.

Swept clean and ready to go
So today a concrete repair crew is showing up. I've spent the last few evenings clearing that part of the shop. My workbench is collapsed, and I covered the walls with a drop cloth to protect from dust or splatter. My friend Kevin came over a couple nights ago to help move my drill press and the ballast-boards under the workbench (Thanks, Kevin!), as well as some other miscellaneous preparatory tasks. 

You may recognize the top of my workbench from a recent post. Here, it is sitting upside-down on the lumber rack.
I'm really excited for the floor to be smooth and flat. Combined with french cleats on the walls, and a generous helping of casters under the massive objects in the shop, this will allow the space to be totally reconfigurable, and allow me to make the best use of space.


Sunday, October 4, 2015

I crammed 3 more saws in my toolchest

Unpacked.
I found/made  a few more spots for saws. I made spots for a fretsaw and a veneer saw in my saw till, and put my bow saw in the small remaining gap. All this needs to be removed when the tool chest is in use. The saw till already comes out, and I was able to hang the bow saw on one of the chest handles to keep it handy and out of the way.
Packed in the tool chest.


These grooves hold the fretsaw in place

magnets hold the veneer saw in place

Tuesday, September 29, 2015

Quick tip: clamps help transport lumber

I discovered that if you have a roof-rack, you can affix boards to it very quickly using a [quick] clamp. This saves time fooling with straps & rope. Just make sure it's tight and won't wiggle.

Taking a couple of french cleats over to a friend's house for installation (on his car). We just saved 5 minutes we can use to decipher concrete anchors at the local home center.
You might still want to use one strap as a safety. Make your own decision on this. I'm not guaranteeing it's safe in every case and you must take responsibility for your own decisions--but this has worked well for me on a half dozen occasions.

Saturday, September 26, 2015

Fitted but loose, a compromise


I recently decided to keep a small plane handy in the top till of my tool chest, but didn't want it banging around with the other tools, going dull or losing it's settings. Neither did I want to "french-fit" it into a permanent part of my tool chest. Sure, I reach for this tool often this month, but that could change.

So I landed somewhere in the middle, making this protective "plane coaster", which fits the tool but isn't nailed down. It protects the blade and provides a little elbow room (not my elbows, hypothetical miniature bronze plane elbows).

I made it out of a scrap of 1/4" aromatic cedar. It was from a pre-tongue-and-grooved board of the sort you can line closets with. There wasn't much to it. I traced the plane footprint onto the wood with a hobby knife, and excavated with a small router plane. I also made a small, probably unnecessary relief for the blade. I like it because it's a visual indication of which direction the plane should face on its way back to its home. I slathered the whole thing with the same camellia oil I used on the plane post-honing, and I really like the way it looks.

As luck would have it, the "coaster" fits snugly enough to stay attached when you lift the plane by the body. We'll see how that changes with the seasons.


By the way, this is the "violin maker's plane" from Lie Nielsen, though I'm using it as you might use any block plane.


Sunday, September 13, 2015

Not quite a Nicholson

I have been struggling with a mess on my workbench for a little while during some shop reorganization, but today I found myself looking at a clean bench and realizing I have never posted about it. You may be familiar with the Nicholson style bench as popularized by Chris Schwarz, and nicely demonstrated by Mike Siemsen. This is basically the front corner of that set on some sawhorses. It's a fraction of a Nicholson ("Farthingson"?).

This bench-top is completed by some adjustable sawhorses, a spare plank, and lots of ballast.
Many woodworkers with voices on the internet sound like they speak from experience when they recommend figuring out your working style before building a fancy bench. Well, that's what this is perfect for. It's actually my second bench. The first one taught be a lot, but was too rickety and really meant for a child.

This one came about because I needed something I could make in a hurry and clamp to a kitchen island to provide a stable place for me to work with 3 friends. I soon realized I could put in on sawhorses and have a temporary bench better than what I had. I am planning on getting around to building a "Roubo" style bench in the near future (that's what the ballast is for), but this is really a perfect & simple way to get on with some projects while learning my preferences. Adjustable height sawbenches really take the cake.

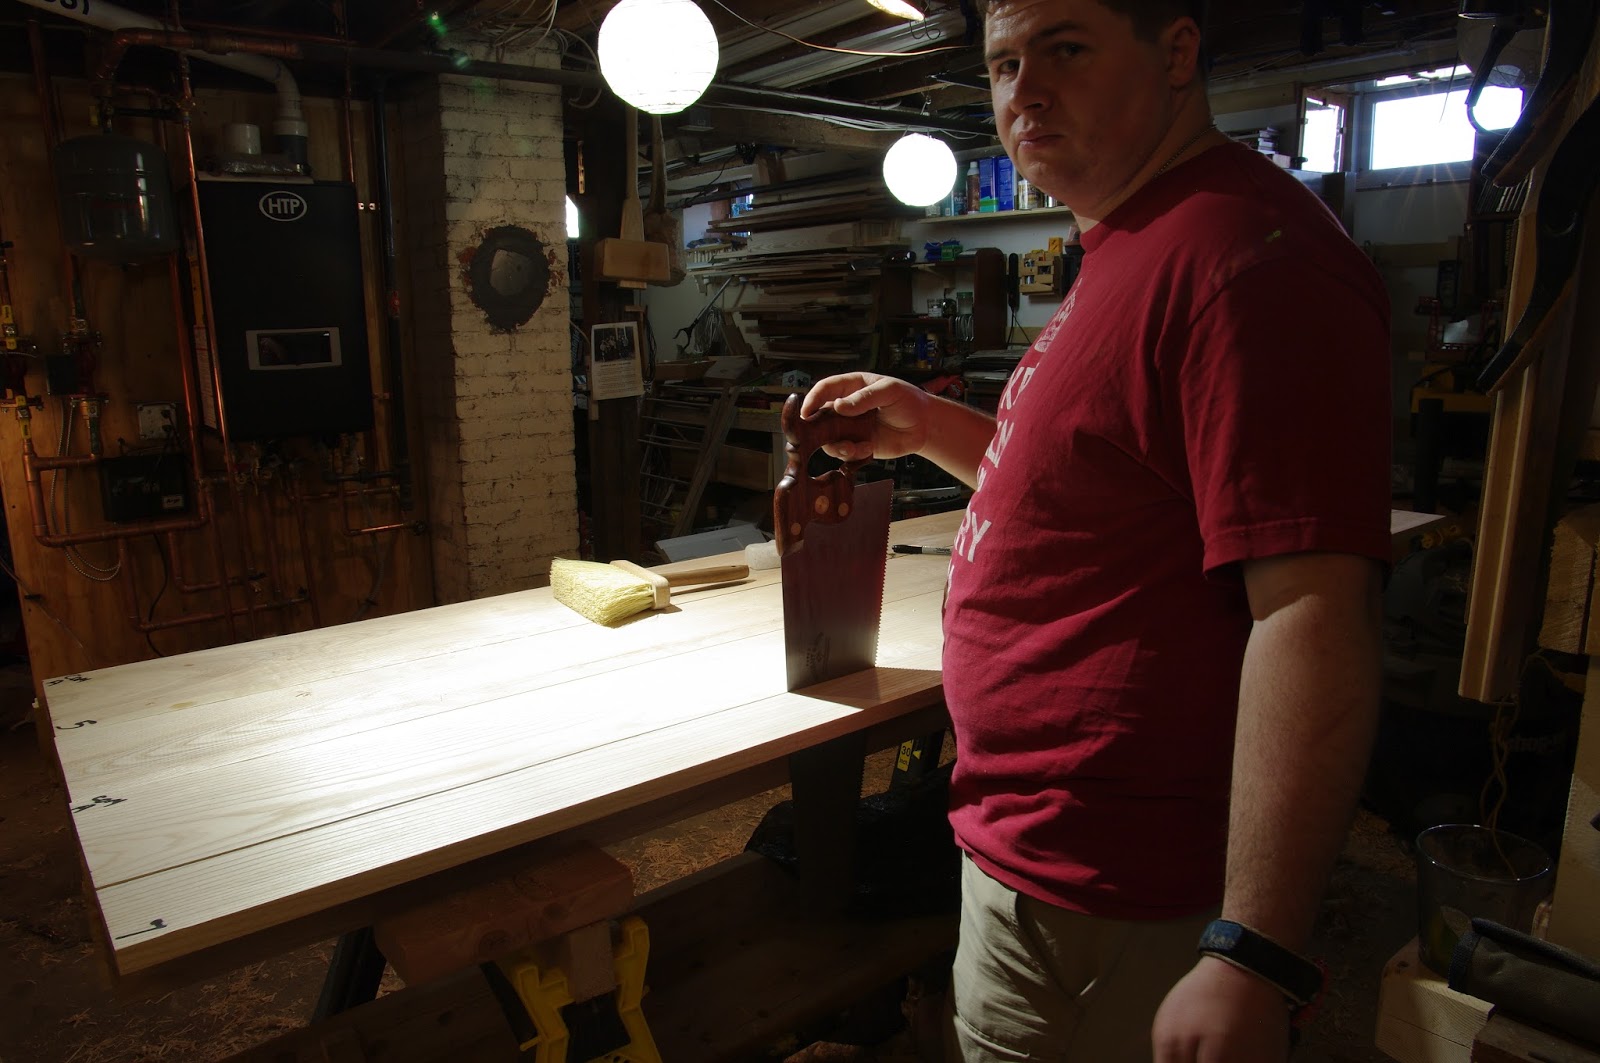
And it couldn't be simpler to build. I screwed some 2x lumber together in an L-shape, then went over it with my jack plane (be sure to sink those screw-heads). I used some small blocks and screws to hold the benchtop to the sawhorses, and used an extra board for more surface area (not leveled with the main top).

Even the dog holes are easy, thanks to a healthy dose of procrastination. I used a marking gauge and dividers to lay out dog holes, but I didn't drill any except the few I needed at the moment. Whenever I need a dog hole that's not there, I grab my brace. I've been using this for over a year now, and there are still dimples in the front waiting for an auger to come along and make them [w]hole (sorry--punning is a disgusting habit). I just haven't needed them in that spot yet. And it's not tiring at all to drill one or two holes at a time.

I've got no vises (or even a crochet), and I do occasionally want for them, but for the most part this bench is great. 3/4" holes are incredibly versatile when aided by the vast array of accessories available today. A thicker top might be nice for holdfasts, and vises would make certain operations faster. I've figured out the bench height I like. So essentially I'm able to work efficiently now, and I know exactly what features I want in a more permanent bench.

You can do a lot without vises. For the picture I loaded it up with pretty much every accessory I have.

The best part is that I can store it on a lumber rack if I need to get it out of the way.

I recommend this bench design if you are just getting started, and you like the idea of being up and running in a couple of hours.

Heck, you can always turn it into a full-fledged Nicholson later if you have a free weekend.


Open frame for squares

Recently I bought a beautifully made double square from Chris Vesper. It got me thinking about how I always feel like I am on the verge of dropping small tools off my narrow (temporary) workbench, and how close I come to to tool abuse taking things in and out of the the tightly packed measuring section of my tool chest. Having been inspired by seeing the Studley tool chest in person, I decided to build a small open frame to hold the square, it's spare blades (rulers) and a couple of related tools.

Frame, en situ. And yes, I do see the irony of putting precisely made measuring tools in this thing with hardly a square corner in it.

And before anyone accuses me of comparing my work to Studley's, I'll say that my workmanship is far, far, worse. And my design is a bit more practical for my use. So this is very different. But we can all learn from Studley when it comes to space efficiency.

Dovetailed frame from padauk and maple tool supports.

I had some scraps of padauk and maple, so I fooled with layout for a bit then got to work.
Wasting away material after tracing the tools. This is tremendously more efficient when I limit myself to exactly one mallet whack for each time I place the chisel.
I made a ton of errors chopping out all the waste at different depths. I just kept going and tried to recover as best I could. I think I used ca glue to recover from about 6 different overenthusiastic chisel blows. But I measured myself mainly on whether to tools fit, and it turned out OK.

I knew this miniature router plane would be handy! In the background you can see a repair in progress--I scabbed on a little block to the other narrow support after I accidentally sent the wrong chip flying.
The design is a small dovetailed frame, with cross supports that have cavities to hold each tool. There is a cavity for every blade for the double square, plus a place for the square itself. This way I can put the square away regardless of what blade is in it at the moment.

Tracing the dovetails of the cross-supports and checking the layout.

Fortunately, my bench hook provided a nice backstop for chopping out these dovetails.
These must be the easiest kind of dovetails to chop out, since it's long grain and can be approached across the grain. Padauk is fairly tame to work with too, except for occasional splintering.
I noticed along the way that some of the color of padauk is alcohol-soluble. I use grain alcohol often to make endgrain easier to work. When I shot all the parts to length, the padauk streaked my block plane's sole purple! It also made an orange splotch on the maple. On a whim, I decided to dye all the maple this way. I scattered some padauk chips on the maple parts and sprinkled them to the point of mild intoxication, then rubbed the chips all over the parts. It looks weird with all the purple and orange, but I'll take weird over boring any day.
Clearly no other woodworkers were around to stop me.

This is what happens when maple gets drunk with padauk. It could have been worse.

After cleaning up the surfaces and applying one coat of danish oil, I'm ready to put this frame to work.

 The end product is functional, convenient, full of mistakes, and totally weird. So, perfect.


Thursday, September 10, 2015

French cleats are done!

I finally finished putting all the french cleats on the wall. Of course, the real challenge wasn't putting a few screws in the wall, it was all the cleaning/organizing I had to do to get to my walls. (Also moving outlets and waiting for paint to dry) I'm glad it's done so I can stay a lot more organized. It also should make it much easier to temporarily clear the floorspace so I can get the concrete flattened (I want to wheel things around).

You see clutter. I see less clutter than before.
While I'm feeling good about having this done, I thought I would share pictures of a few more hangers that may not have appeared on the blog yet. Most of it is crude but functional. I like to get it built quick:
Belt sander resting on a dowel while cord wraps around blocks.
RO sander & cord hanging in notches. This piece of plywood is glued into a groove that I made quickly with a plow plane.

I skipped the classic shelf/pin combo and just went for adjustable dowels to hold my [power] sandpaper. A set of dividers for spacing and a bit of paraffin on each dowel makes this easy.


A hook to hold my jigsaw. Holes for dowels were drilled after the main stack was already glued and dried, since that's the easy way to do this.

My friend Matt made this nice "cup" holder when he was visiting one day. (I was finishing up the cleats). Thanks, Matt!

These weird broom holders work well on pipe clamps because of their slightly rough surface. But I recommend throwing the plastic backer away and using 3 flathead screws for each hook.

I cut up an old shelf (that was on the pre-cleat wall)
 and put cleats on the back. Unlike the others, this one has hooks on it.

A pair of clamp racks doubles as a temporary lumber rack. Hands down the easiest thing I've made for the cleats.

I made this hanging panel with a strip of cleat on the back so I can cut off a piece any time I need another hook.

These are the two jigs that I made to install the cleats. The left one is a spacer, set to 1 foot. With the aid of a small clamp, it was also my third hand when hanging cleats. On the right is a nail in a chunk of cleat with a plumb line hanging on it--it saves a lot of time with the studfinder.