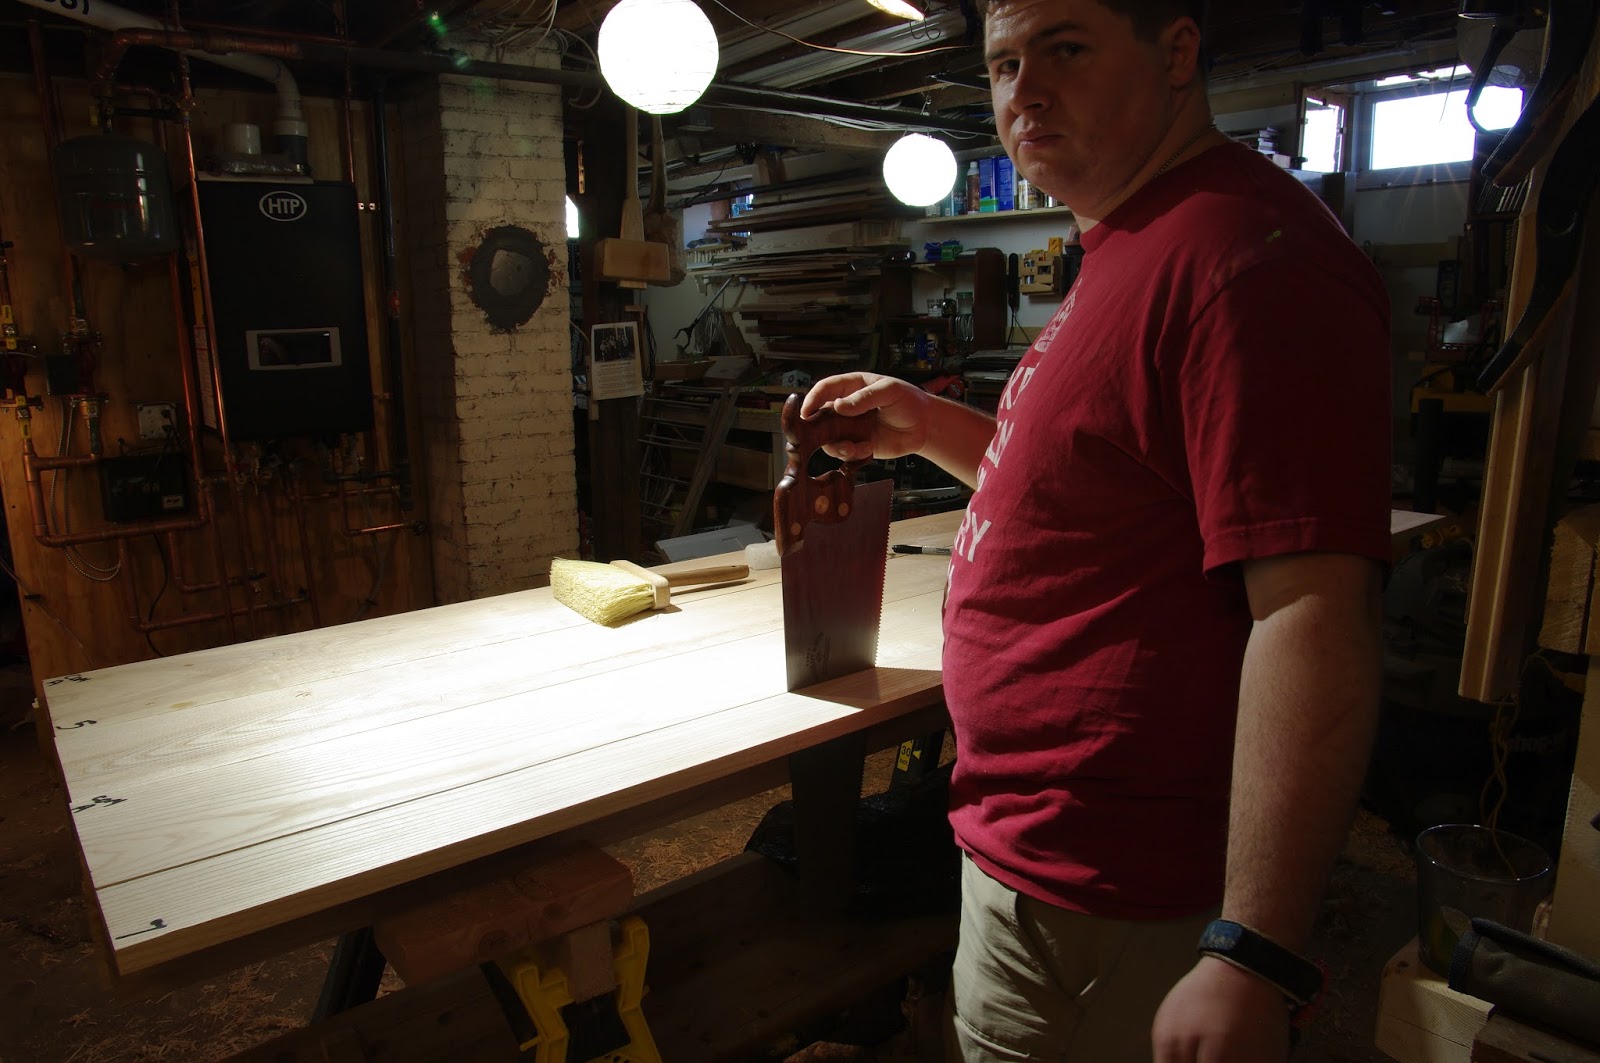
Here is what my shop looks like right now, in all its chaotic glory:
Showing posts with label workbench. Show all posts
Friday, April 26, 2019
Quick update before heading to Fine Woodworking Live
It's been a little while. Since last post, I've got my French/Schwartz style bench up and running, got organized, and also helped make a whole new person! It turns out we like Emerson while a lot. Unfortunately, I haven't yet taught Emerson to say "I consent to you posting my likeness on the public internet"--but he's only zero years old, so there is hope. I'm happy with the amount of woodworking I'm doing, although much of it is in the form of practical household problem solving, and it's not always pretty. I'm not so happy with my ability to keep this page full of the ideas I want to share. I'm still here, but I'm going through a time-challenged phase. I plan to breathe some new life into this page one way or another before the year is out.
Here is what my shop looks like right now, in all its chaotic glory:
Thursday, October 5, 2017
How to flip a 400 lb workbench over by yourself
NOTE: Despite the title, I don't recommend doing this without some help. Because that could be unsafe and kind of irresponsible. But I did it, so I'll share it.
Two unexpected turns of events happened today in regards to my workbench project.
I was working on the sliding dovetail endcaps for my workbench and I realized that I actually wanted to flip the bench before I finished, not after. I had been concerned about flushing the bottom, but now that I'm dealing with tweaking test fittings, I realize I would rather do that part in a way that allows to make sure it'll look OK in it's normal position. I'll have to get the bottom surface right with accurate marking and a test fitting or two. So, suddenly I wanted to flip my bench ASAP, which I did not expect. The bench weighs several hundred pounds, so I sent out a request for help from a few friends and started to clean and prepare.
Now, I'm not exactly coming out in favor of lifting heavy things on one's own, because that can be dangerous. However, I was able to do something I thought I couldn't do on my own just by doing one step at a time, thinking each one through carefully, and doing it in an environment free from tripping hazards, etc. So that was encouraging, and a useful reminder of what's possible.
Two unexpected turns of events happened today in regards to my workbench project.
![]() |
| Step 1: Get frustrated enough to question my approach and decide it's time to flip the table (bench). Step 2 is a bunch of cleaning that's not pictured. |
![]() |
| Step 4: Grab the highest stretcher, gently kick the nearest ends of the sawhorses out of the way and lower the stretcher until the bench is vertical. |
![]() |
| Step 5: Pick up each and and kick the sawhorse out of the way, then lower that end a few inches to the ground. |
Now, I'm not exactly coming out in favor of lifting heavy things on one's own, because that can be dangerous. However, I was able to do something I thought I couldn't do on my own just by doing one step at a time, thinking each one through carefully, and doing it in an environment free from tripping hazards, etc. So that was encouraging, and a useful reminder of what's possible.
![]() |
| Step 6: Play with the vise, bask in the joy of finally having a real workbench in your space, and contemplate sweeping again. |
Saturday, September 16, 2017
Workbench base done
I finished assembling my workbench base this morning and pounded it into place. I'm really eager to flip it over for real, but I need to make endcaps and flush the bottom edge first. So I'll do it in a photo.
![]() | |
|
![]() |
| Bench in need of endcaps, and several strong people to flip it upright. |
Thursday, September 14, 2017
Feeling good, Leg vise works
I'm back at my bench build in earnest now, and I'm eagerly anticipating being able to flip the bench upright and use it very soon. But for now, I'm excited to see the leg vise together and working. Here's a video:
Wednesday, September 6, 2017
glue-containing grooves
Here's a trick I used today while working on my workbench stretchers:
I wanted to use the glue-up to create a rabbet, laminating two boards offset from each other. I didn't want glue seeping out on that side to keep it clean. So I made a small groove to contain the glue by catching a little squeeze-out. I used a little convex palm plane since I have one handy, but if I didn't have that I might tilt a shoulder plane and make a couple passes with the corner. I am sacrificing a little strength near the edge by doing this, so there's a trade-off. In this case there is an enormous amount of glue area so it's worth sacrificing a small amount of strength to make a clean joint.
Two notes in case you want to try this:
1.) Spread the glue well, and try hard to put the right amount on, since the grooves only catch a little. Spreading it with a card really helps you see where it might need more to wet both sides. Experience helps a lot, here.
2.) Clamp near the grooves first. This will force the glue out the other side.
![]() |
| Look closely to see a shallow groove outlining the glue area's perimeter. Also shown is the tiny plane I used to do it. |
I wanted to use the glue-up to create a rabbet, laminating two boards offset from each other. I didn't want glue seeping out on that side to keep it clean. So I made a small groove to contain the glue by catching a little squeeze-out. I used a little convex palm plane since I have one handy, but if I didn't have that I might tilt a shoulder plane and make a couple passes with the corner. I am sacrificing a little strength near the edge by doing this, so there's a trade-off. In this case there is an enormous amount of glue area so it's worth sacrificing a small amount of strength to make a clean joint.
Two notes in case you want to try this:
1.) Spread the glue well, and try hard to put the right amount on, since the grooves only catch a little. Spreading it with a card really helps you see where it might need more to wet both sides. Experience helps a lot, here.
2.) Clamp near the grooves first. This will force the glue out the other side.
Thursday, January 26, 2017
Workbench update for January 2017
As I've mentioned before, I spent a lot of 2016 neglecting my workshop. I did the shop stool and the cutting board, along with a few other small things, to get my motivation snowballing again. Now I'm starting to dig in (literally) to the workbench again. The top is still upside-down, generally presenting an inviting surface on which to put clutter, and not being very useful as a worksurface without any workholding.
![]() |
| Here's a look at most of the setup for routing these dead-man grooves. Annoyingly, the aluminum guide was slightly curved until I forced it into alignment with a clamped-on batten (not shown). |
But while it's in this position, I want to do as much as I can, to save flipping it over multiple times. This means cutting one side of sliding dovetails for the endcaps, without being able to fit the endcaps on. It means cutting sliding deadman slots (plural, because I put one on the back too, in case I want to use the back), but not having anything to slide in them. Soon it will mean partially installing an end vise and partially completing leg joinery. I think the lack of immediate reward is part of the reason I've been procrastinating. But I got going again, and this time I don't plan on slowing down until it's got all the necessary features and finish on it.
![]() |
| This 3/4" spiral upcut bit is just the ticket, as long as you wear a mask and don't leave any containers open. |
I think another reason I have been procrastinating a little is that the scale of this project makes certain power tools almost indispensable, but I really don't enjoy all the dust. But the router really did make the sliding dead-man grooves practical (since I forgot to cut them pre-lamination).
![]() |
| I actually convinced my circular saw to do a stopped plunge cut so it wouldn't have the final say on the ends. It was almost accurate, though. |
Cutting the ends square was greatly aided by my circular saw, although I did cut the ends (where it will show) with a sash saw for better accuracy. I did manage to get the circ saw reasonably perpendicular, though.
![]() |
| All my workbench reference materials, in one place. |
Despite all the procrastination, and delays, I seem to have regained my momentum. There were two things I did that seemed to help a lot. One thing was to get my notes organized. Each task gets a full page containing drawings, and any notes or concerns. This has helped me avoid wondering what I'm missing. A couple of workbench books act as appendices, because my notes contain page numbers.
![]() |
| This 3" thick slab of maple was acting as a dedicated sharpening area, even while I was temporarily without a workbench. How did I not think of drilling dog-holes in it sooner? |
Another thing that helped me want to be in the shop was some temporary workholding. I turned my dedicated sharpening station into a temporary bench by clearing it off and drilling a row of dog holes. This plus appliances I already have makes it easy to do whatever work comes up, whether for the workbench, or a small side project to keep me motivated. This is the thing that really made me feel like spending a lot of time in the shop again.
That's what's going on in my shop. I hope something's going on in yours, too.
![]() |
| ...and for no reason at all, here is a picture of my dog during the 1.5 seconds in which he tolerated my sunglasses. |
Wednesday, December 28, 2016
Adjustable height stool
When I started building my workbench, I promised myself I would avoid the complexity of any height adjusting mechanisms or bench-on-bench contraptions, instead deciding the simpler way to get close to my work was having a good place to sit. I recently decided to get a little fancy and make the stool adjustable. This was also a good opportunity to try out tapered round mortise & tenon joinery, which was extremely simple compared to the usual rectangles.
Construction details:
![]() |
| My newest workbench accessory |
Construction details:
- maple with walnut wedges. I accidentally put the wedges in the wrong direction, but fortunately nothing split)
- tapered octagonal legs were made by laying out both ends and planing to the lines. A handscrew clamp, itself clamped to the bench, was instrumental in holding the legs after I had tapered the first two sides. A jack plane with a rank setting made short work of it.
- I used a reamer and tenon cutter from Lee Valley
- mortises were made by drilling and using a tapered reamer
- tenons were made by sawing shoulders, whittling approximate tapers, then using a tenon cutter
- the legs are arranged to sort of "windmill" around the center, because I like the way it looks. If I were to do it again, I would make them splay out more for increased stability. But what I did works OK.
- The adjustment comes from so-called "piano stool hardware" that I found at Lee Valley. It works really smoothly (and could probably serve as good vise hardware). The overall height is quite low, raning from "I'm sitting at the workbench" down to "My eyes are peeking above the workbench surface".
- The seat and hub were made from 8/4" maple, laid out as a circle on a board that was just wide enough for the hub. This makes the stool very stout, although a little top-heavy for my taste.
- The seat was shaped using spokeshaves, drawknives, a jack plane, and probably a few other shaping tools I have lying around. Since the stool lives in the workshop, I'll probably shape it more as time goes on and I learn where the uncomfortable parts are (I've already gone back and done this once).
- I finished with one coat of danish oil, which is very minimal, but looks nice and is easy to reapply after subsequent seat re-shaping.
Sunday, December 13, 2015
This is what a hand-tool problem looks like.
This is how far I got ripping by hand (pictured) before I remembered that I have an electric jigsaw. Maybe 2 or 3 feet.
...Then I thought, "meh, I don't feel like taking it off the wall", and proceeded to rip the rest of the 7 feet by hand.
In all fairness, using the jigsaw would have meant taking it down, plugging it in, puttting on safety glasses, hearing protection, and dust mask, making the cut while keeping the cord out of the way, putting the tool away, putting eye/ear protection away, wearing the dust mask a little longer while the dust settled, getting sick of it and taking it off after 10 minutes, and having an itchy throat for 3 days. Heck, I needed the exercise anyway.
But these are just rationalizations and excuses. Obviously, power tools are always more efficient. If you see a scene like this or hear so-called reasons like these from a friend or loved one, help is not far away.
Take them to your local power-tool vendor and introduce them to a salesperson. They probably just need someone to accuse them of being crazy, before it's too late.
| Step 1 is admitting you have a problem, and I think step 2 is bargaining. After that I'm a bit hazy. |
...Then I thought, "meh, I don't feel like taking it off the wall", and proceeded to rip the rest of the 7 feet by hand.
In all fairness, using the jigsaw would have meant taking it down, plugging it in, puttting on safety glasses, hearing protection, and dust mask, making the cut while keeping the cord out of the way, putting the tool away, putting eye/ear protection away, wearing the dust mask a little longer while the dust settled, getting sick of it and taking it off after 10 minutes, and having an itchy throat for 3 days. Heck, I needed the exercise anyway.
But these are just rationalizations and excuses. Obviously, power tools are always more efficient. If you see a scene like this or hear so-called reasons like these from a friend or loved one, help is not far away.
Take them to your local power-tool vendor and introduce them to a salesperson. They probably just need someone to accuse them of being crazy, before it's too late.
Saturday, December 12, 2015
2 things that really don't need to be combined.
Woodworking and drones, that is. The other day when my friend Kevin was with me in the shop, we were playing with a new toy--a cheap little quadcopter that can take lo-fi videos. I was flattening the bottom of the top of my workbench, so we got some footage. Here it is, in all it's shaky, low-resolution glory.
Friday, December 11, 2015
2 out of 2 ghost agree: there's no such thing as too many clamps
Yesterday my good friend Kevin was at my place, and he was nice enough to help me glue some more thickness onto my workbench top. More hands make it easier to finish while the glue is wet, so thanks a bunch Kevin! We are both interested in photography and silliness, so this was the result:
Bonus tip: spreading shavings around the floor is a good way to catch glue drips. Just sweep when dry(ish).
| We piled on weight, and then used typical clamps to get the front glueline as tight as possible. |
Bonus tip: spreading shavings around the floor is a good way to catch glue drips. Just sweep when dry(ish).
Wednesday, December 9, 2015
Trying a wooden jack plane
| This old jack is still a workhorse |
At the end of this experiment, I'll be getting rid of one jack plane. Building the Anarchist's tool chest has taught me to value my space highly, and I now own three jack planes, two of which are set up for efficient mass stock removal. So I'm paying close attention and thinking hard about my choices here.
So far, the wooden jack is looking like a potential winner, largely because of the weight (so it's good I didn't get the solid rosewood one). Like I would with any jack, I spent a few minutes cambering the blade.
However, there were a few caveats with this approach:
- The back of the iron wasn't perfect, so I had to swallow my perfectionist nature and use the ruler trick on the back. I'm hoping the tiny back bevel will disappear with successive sharpenings. This doesn't matter much at all.
- Adjusting the wooden plane takes a few minutes to get used to. For me, this was about 15 minutes. Maybe it would take longer if I was trying to be as precise as I would be for a smoothing plane, but for coarse shavings, it doesn't seem to be a big deal. Hit the toe, iron, and wedge until it sits where you want it to--no big deal if you are comfortable with any other plane.
- Buying used has it's pitfalls. If I wasn't paying attention I could have bought one with no wedge. I recommend paying attention to detail even if you're not spending hundreds of dollars, because of the time you can save. I looked at all the same things I would look at if I was about to tune it up--does the wedge hold the blade firmly, does the blade have some life left in it, is the tote relatively intact, etc. In the end, I probably spent an hour browsing the store, and a half-hour getting the plane tuned up.
However, none of these really amount to much compared to the fact that I just knocked about a 16th of an inch off the bottom of a 2'x7' workbench while barely breaking a sweat.
| This rippled surface might give you some idea of the shavings that are coming off. |
So, I think lightweight and wooden is a good way to build a jack plane. In a smoother or jointer, I appreciate the precise depth adjustments that come from typical metal versions, but with a jack plane I just want to get on with the work without making my muscles too sore. (But for the amount of wood I had to remove on the bottom of my bench, starting with a circular saw and an axe didn't hurt either.)
In conclusion, wooden planes are fun, efficient, and not scary. Cheers!
Saturday, November 14, 2015
How to build a workbench with another workbench in the way
I'm finally starting my Roubo[-style workbench]. I ordered hardware, a gallon of glue, and started jointing and gluing up the ash that's been sitting around my basement waiting for this day. I'm hoping to get it done this calendar year.
Although I did briefly consider a half-serious walkthrough of the process of building it using another workbench, there's just been too much Roubo on the internet already. So here's a few pictures just to show you that I'm starting in on it. I'll sum up when I'm done with a brief look at any unusual features or choices.
Cheers!
| Jointing a lot of boards |
| Planning the glue-ups. |
| Clamps on glue makes me feel like I'm actually building something. |
Sunday, September 13, 2015
Not quite a Nicholson
I have been struggling with a mess on my workbench for a little while during some shop reorganization, but today I found myself looking at a clean bench and realizing I have never posted about it. You may be familiar with the Nicholson style bench as popularized by Chris Schwarz, and nicely demonstrated by Mike Siemsen. This is basically the front corner of that set on some sawhorses. It's a fraction of a Nicholson ("Farthingson"?).
Many woodworkers with voices on the internet sound like they speak from experience when they recommend figuring out your working style before building a fancy bench. Well, that's what this is perfect for. It's actually my second bench. The first one taught be a lot, but was too rickety and really meant for a child.
This one came about because I needed something I could make in a hurry and clamp to a kitchen island to provide a stable place for me to work with 3 friends. I soon realized I could put in on sawhorses and have a temporary bench better than what I had. I am planning on getting around to building a "Roubo" style bench in the near future (that's what the ballast is for), but this is really a perfect & simple way to get on with some projects while learning my preferences. Adjustable height sawbenches really take the cake.
And it couldn't be simpler to build. I screwed some 2x lumber together in an L-shape, then went over it with my jack plane (be sure to sink those screw-heads). I used some small blocks and screws to hold the benchtop to the sawhorses, and used an extra board for more surface area (not leveled with the main top).
Even the dog holes are easy, thanks to a healthy dose of procrastination. I used a marking gauge and dividers to lay out dog holes, but I didn't drill any except the few I needed at the moment. Whenever I need a dog hole that's not there, I grab my brace. I've been using this for over a year now, and there are still dimples in the front waiting for an auger to come along and make them [w]hole (sorry--punning is a disgusting habit). I just haven't needed them in that spot yet. And it's not tiring at all to drill one or two holes at a time.
I've got no vises (or even a crochet), and I do occasionally want for them, but for the most part this bench is great. 3/4" holes are incredibly versatile when aided by the vast array of accessories available today. A thicker top might be nice for holdfasts, and vises would make certain operations faster. I've figured out the bench height I like. So essentially I'm able to work efficiently now, and I know exactly what features I want in a more permanent bench.
The best part is that I can store it on a lumber rack if I need to get it out of the way.
I recommend this bench design if you are just getting started, and you like the idea of being up and running in a couple of hours.
Heck, you can always turn it into a full-fledged Nicholson later if you have a free weekend.
![]() |
| This bench-top is completed by some adjustable sawhorses, a spare plank, and lots of ballast. |
This one came about because I needed something I could make in a hurry and clamp to a kitchen island to provide a stable place for me to work with 3 friends. I soon realized I could put in on sawhorses and have a temporary bench better than what I had. I am planning on getting around to building a "Roubo" style bench in the near future (that's what the ballast is for), but this is really a perfect & simple way to get on with some projects while learning my preferences. Adjustable height sawbenches really take the cake.
And it couldn't be simpler to build. I screwed some 2x lumber together in an L-shape, then went over it with my jack plane (be sure to sink those screw-heads). I used some small blocks and screws to hold the benchtop to the sawhorses, and used an extra board for more surface area (not leveled with the main top).
Even the dog holes are easy, thanks to a healthy dose of procrastination. I used a marking gauge and dividers to lay out dog holes, but I didn't drill any except the few I needed at the moment. Whenever I need a dog hole that's not there, I grab my brace. I've been using this for over a year now, and there are still dimples in the front waiting for an auger to come along and make them [w]hole (sorry--punning is a disgusting habit). I just haven't needed them in that spot yet. And it's not tiring at all to drill one or two holes at a time.
I've got no vises (or even a crochet), and I do occasionally want for them, but for the most part this bench is great. 3/4" holes are incredibly versatile when aided by the vast array of accessories available today. A thicker top might be nice for holdfasts, and vises would make certain operations faster. I've figured out the bench height I like. So essentially I'm able to work efficiently now, and I know exactly what features I want in a more permanent bench.
![]() |
| You can do a lot without vises. For the picture I loaded it up with pretty much every accessory I have. |
The best part is that I can store it on a lumber rack if I need to get it out of the way.
I recommend this bench design if you are just getting started, and you like the idea of being up and running in a couple of hours.
Heck, you can always turn it into a full-fledged Nicholson later if you have a free weekend.
Monday, January 19, 2015
Lots of ash for a future workbench
Continuing the recent theme of lumber aqcuisitions, here's one from a couple of years ago that I never posted. I forget how many board feet of ash I got, but I remember that I figured out it was about 400 Lbs.
![]() |
| Not a bad haul |
![]() |
| shorter, wider boards will become legs |
![]() |
| The 7' lengths after arriving in my shop. Yeah, that looks like enough for a workbench top. |
Subscribe to:
Posts (Atom)